Hello and Welcome to Paythepoolman Help Pages!
Here you'll learn how to create and fill out a Vehicle Checklist in Fleet Manager on Paythepoolman Plus!
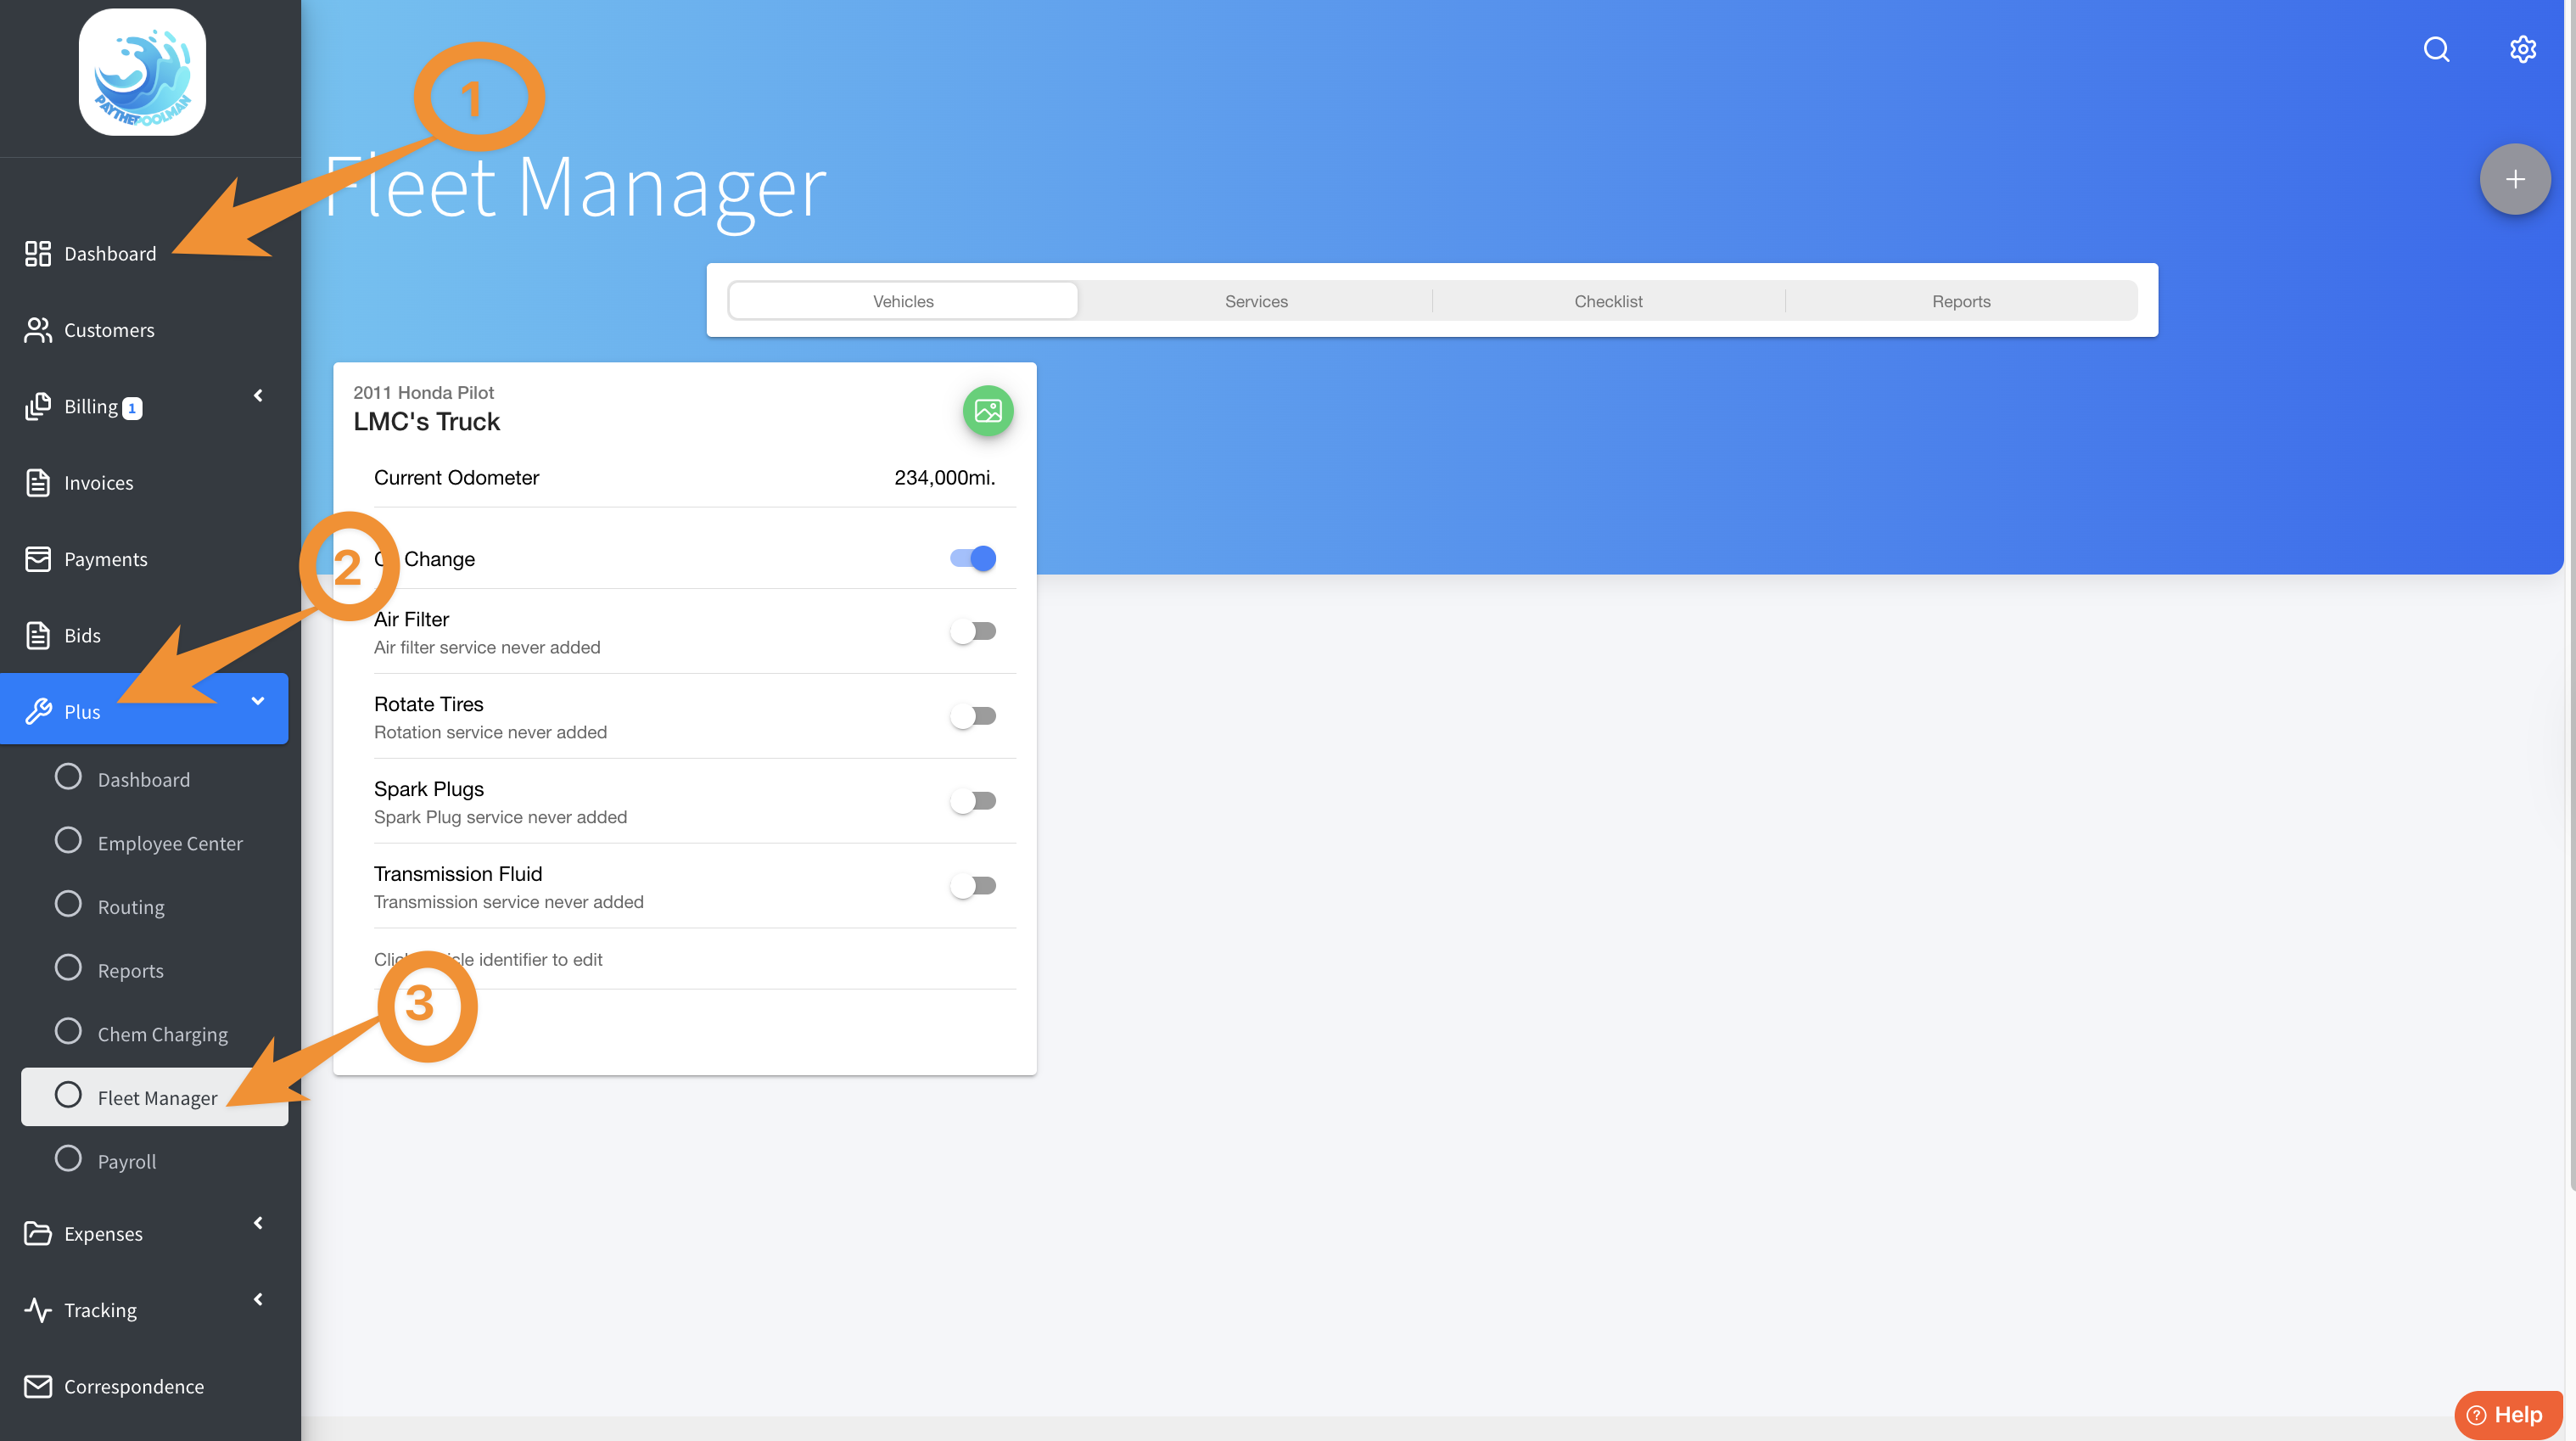
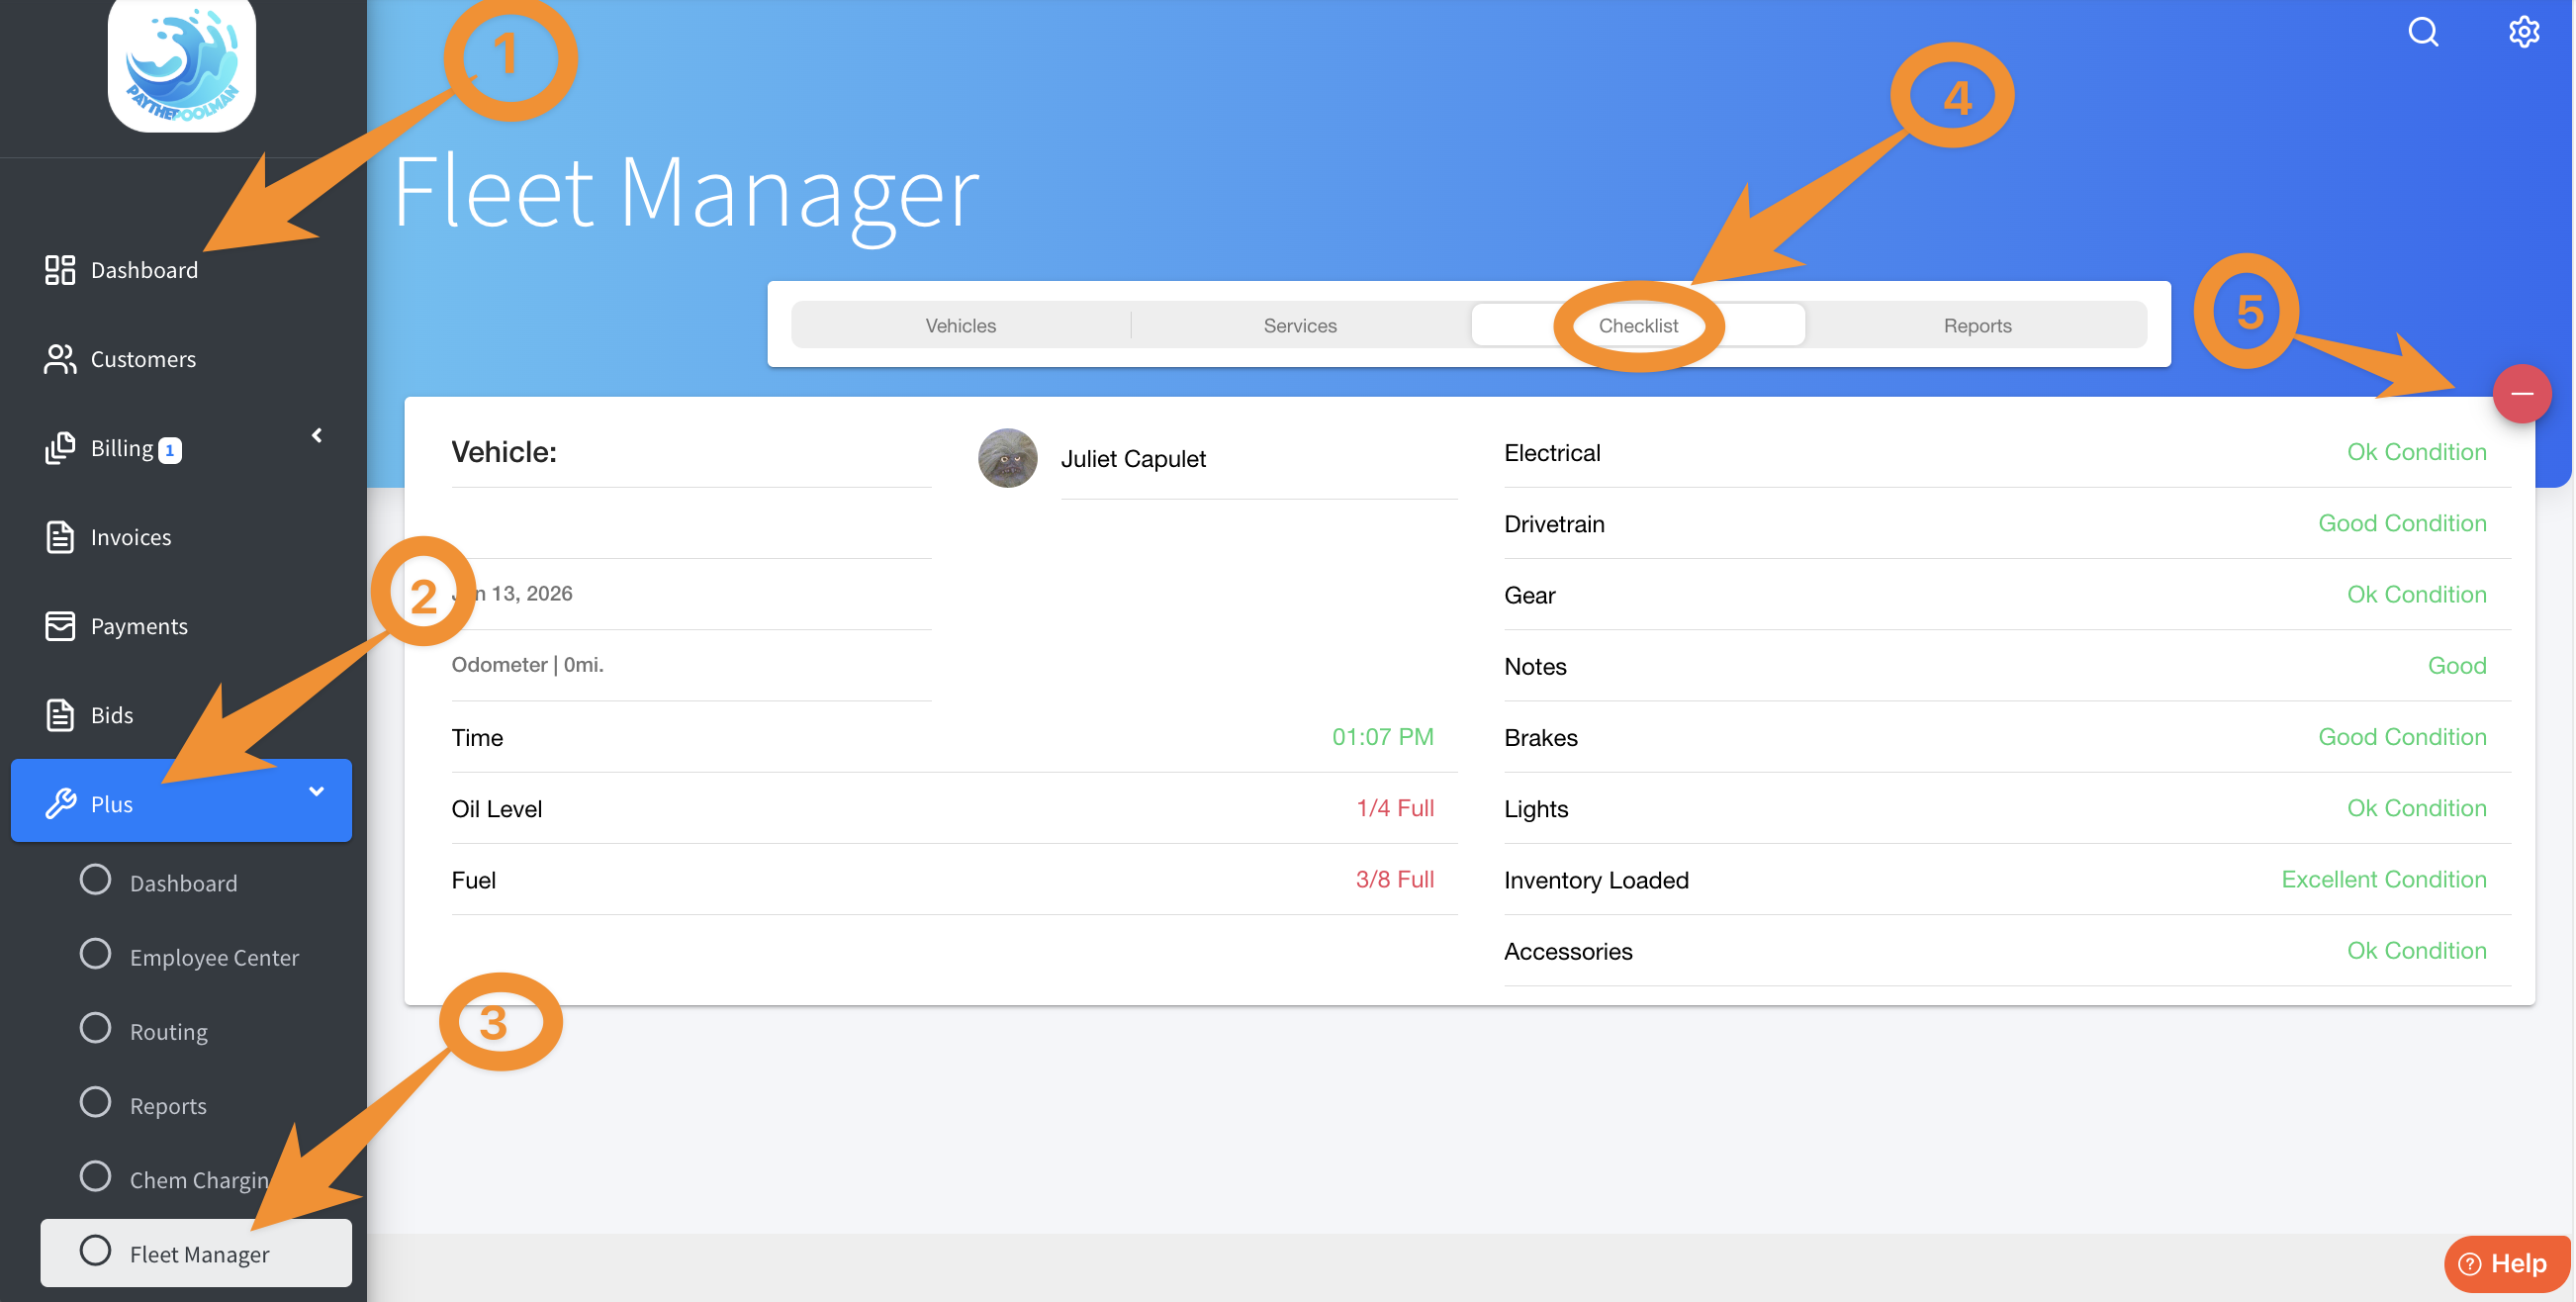
1. From your Company Dashboard, navigate to PLUS on the black sidebar to the left. When the dropdown menu opens, select FLEET MANAGER
NOTE: CHECKLIST area will be blank until one of your technicians has completed
a VEHICLE CHECKLIST from their PLUS APP.
______________________________________________________________________
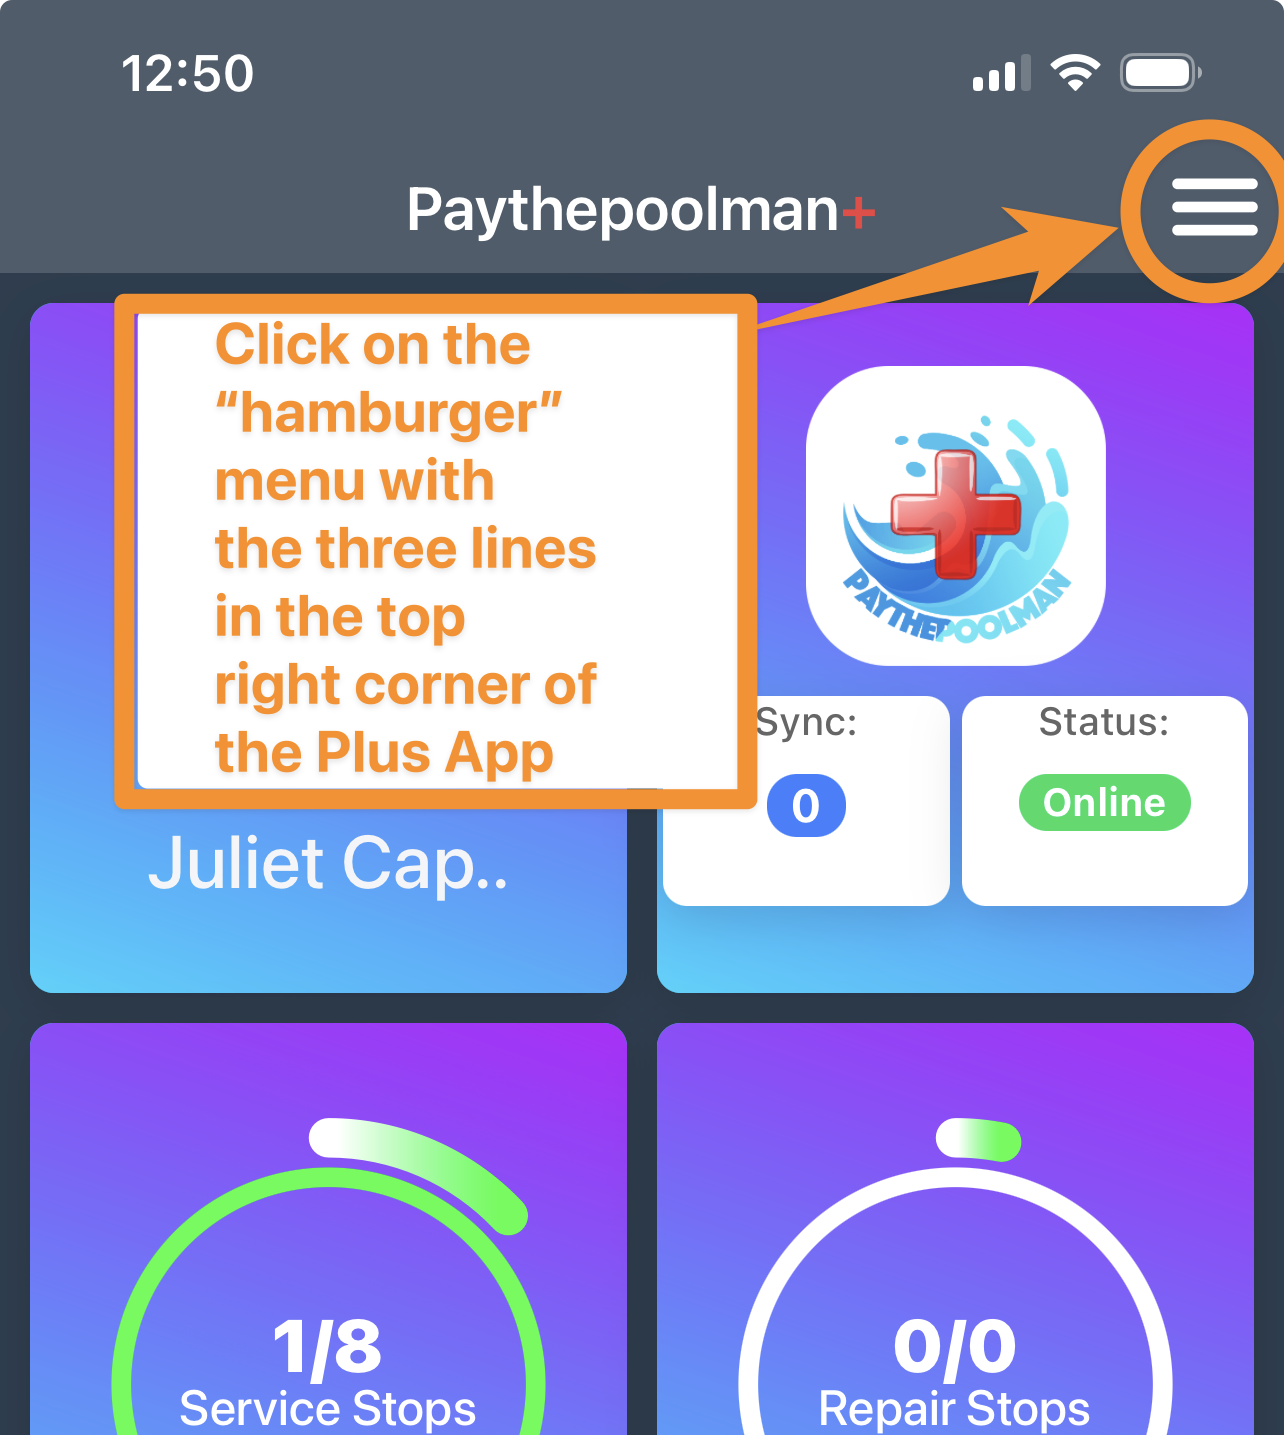
Technicians will follow these steps from the PaythePoolman Plus app on their device:
1. From the Plus App Dashboard, click on the "hamburger" menu in the top right corner with the three lines:
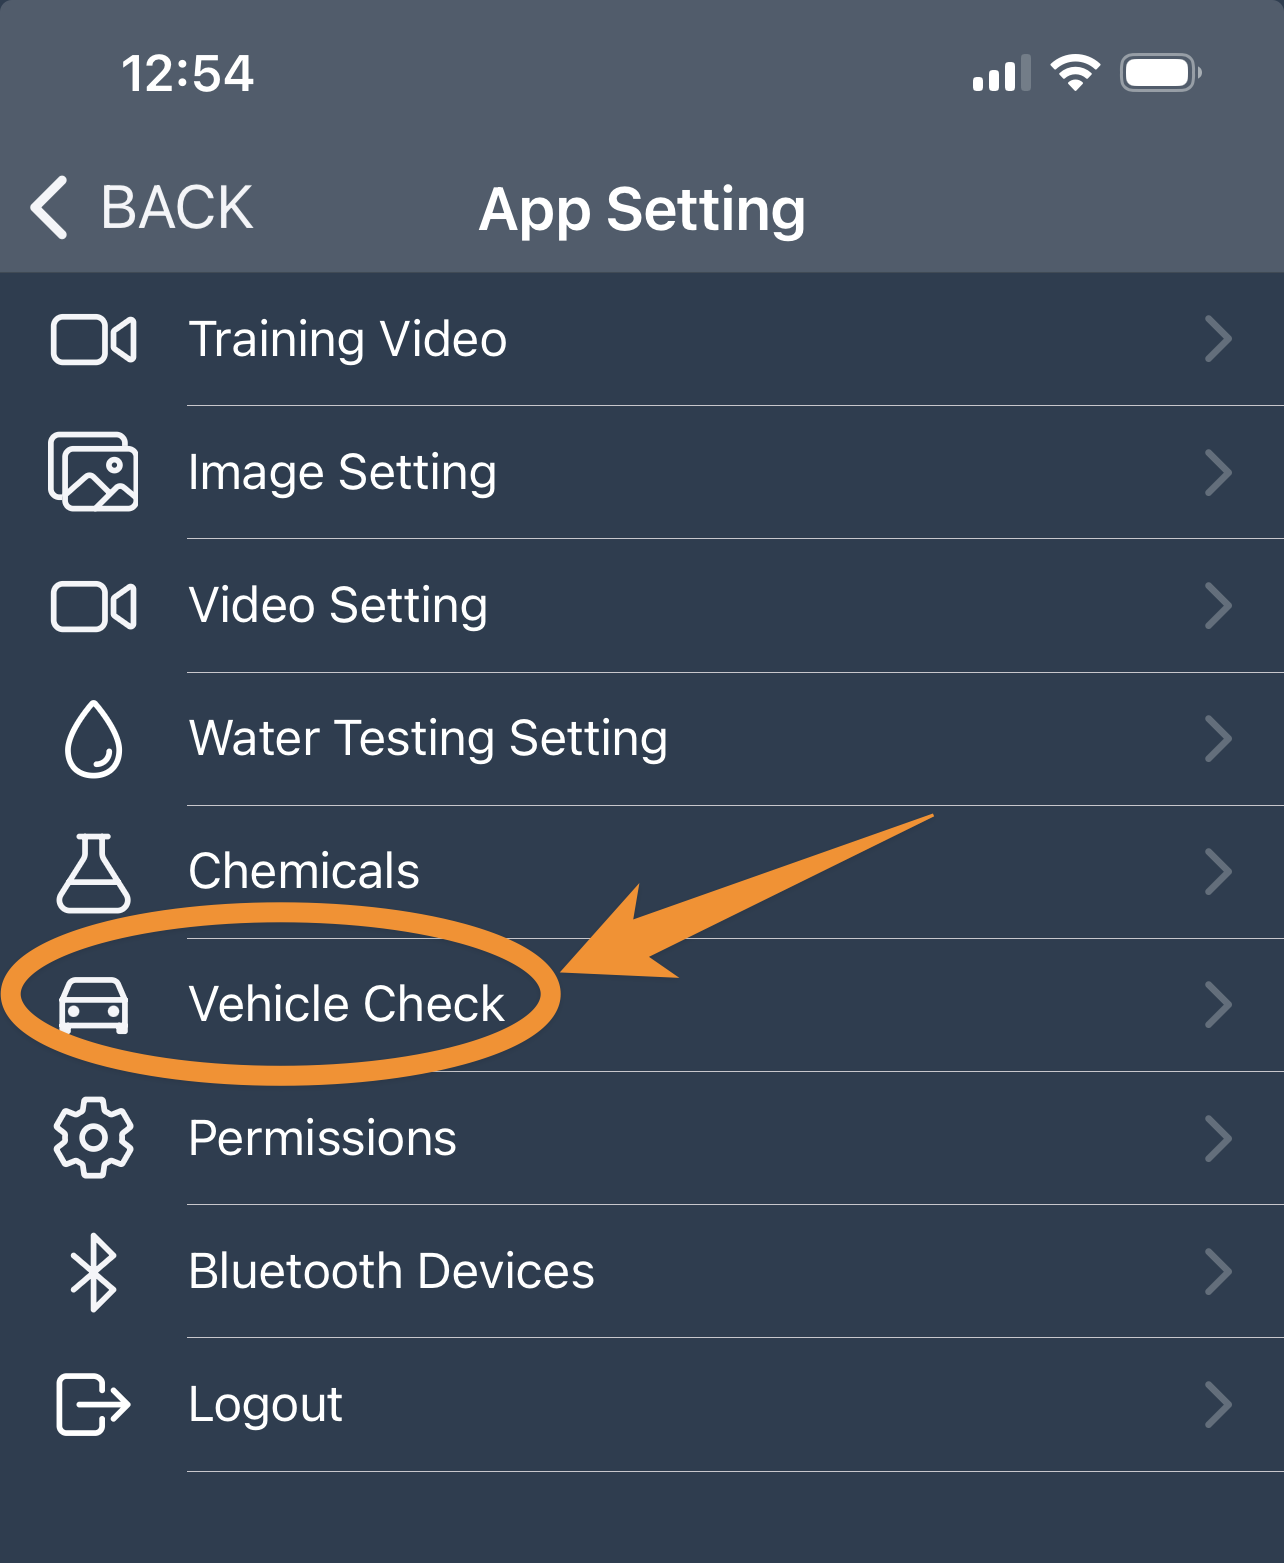
2. Select VEHICLE CHECK:
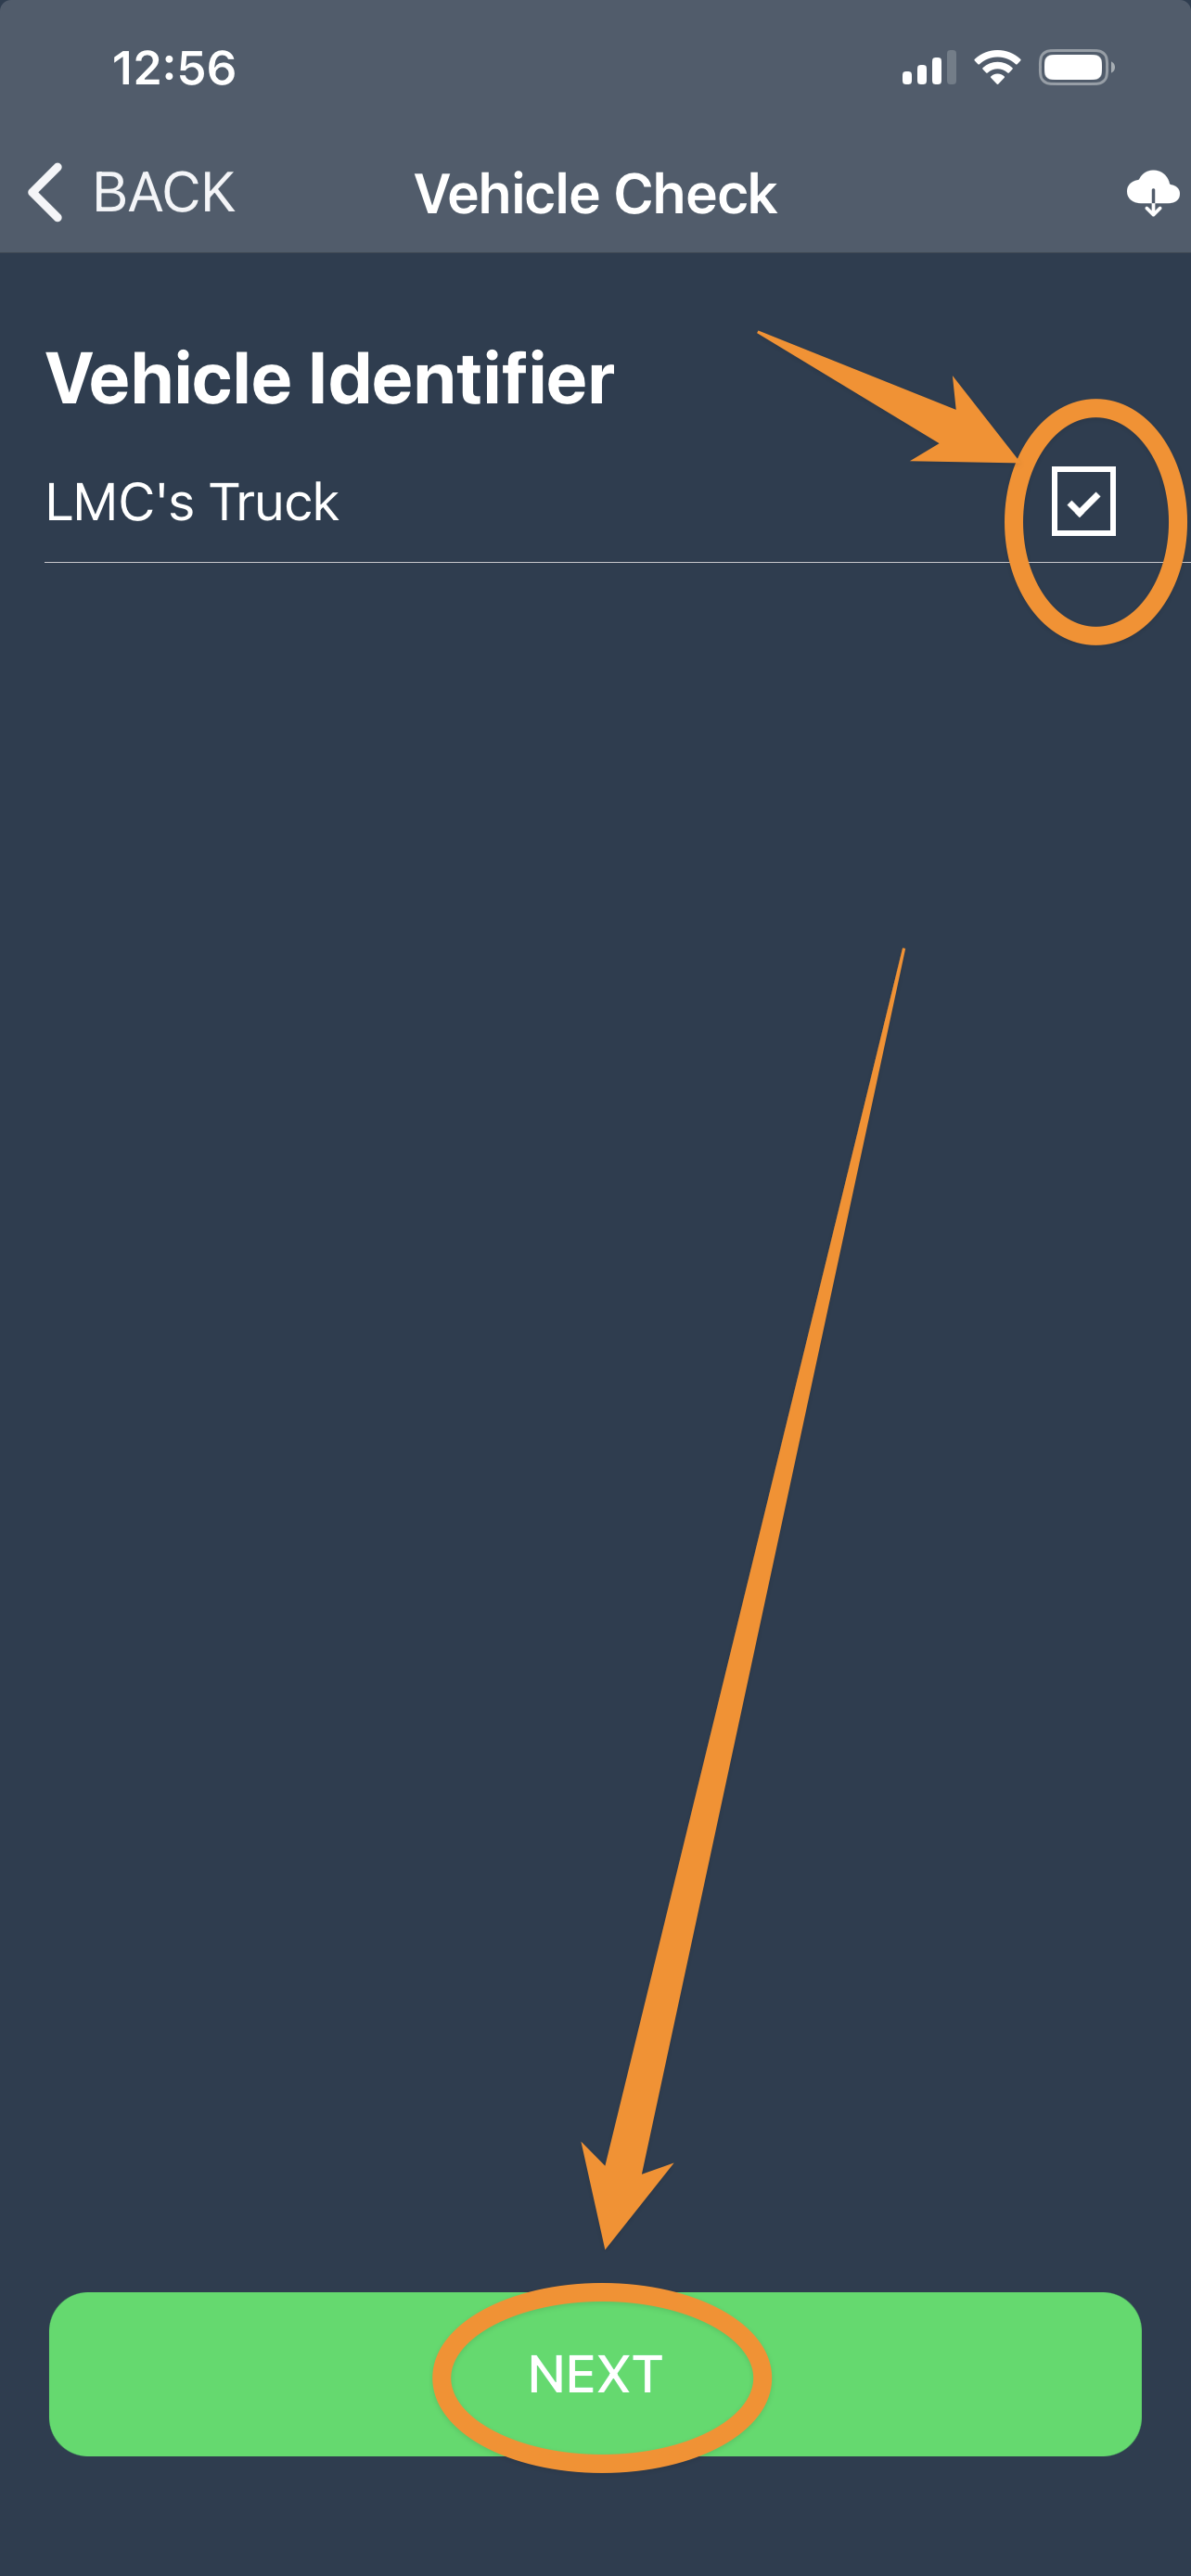
3. Select which of the vehicles in your company's fleet for which the Vehicle Check is being performed, then hit NEXT.
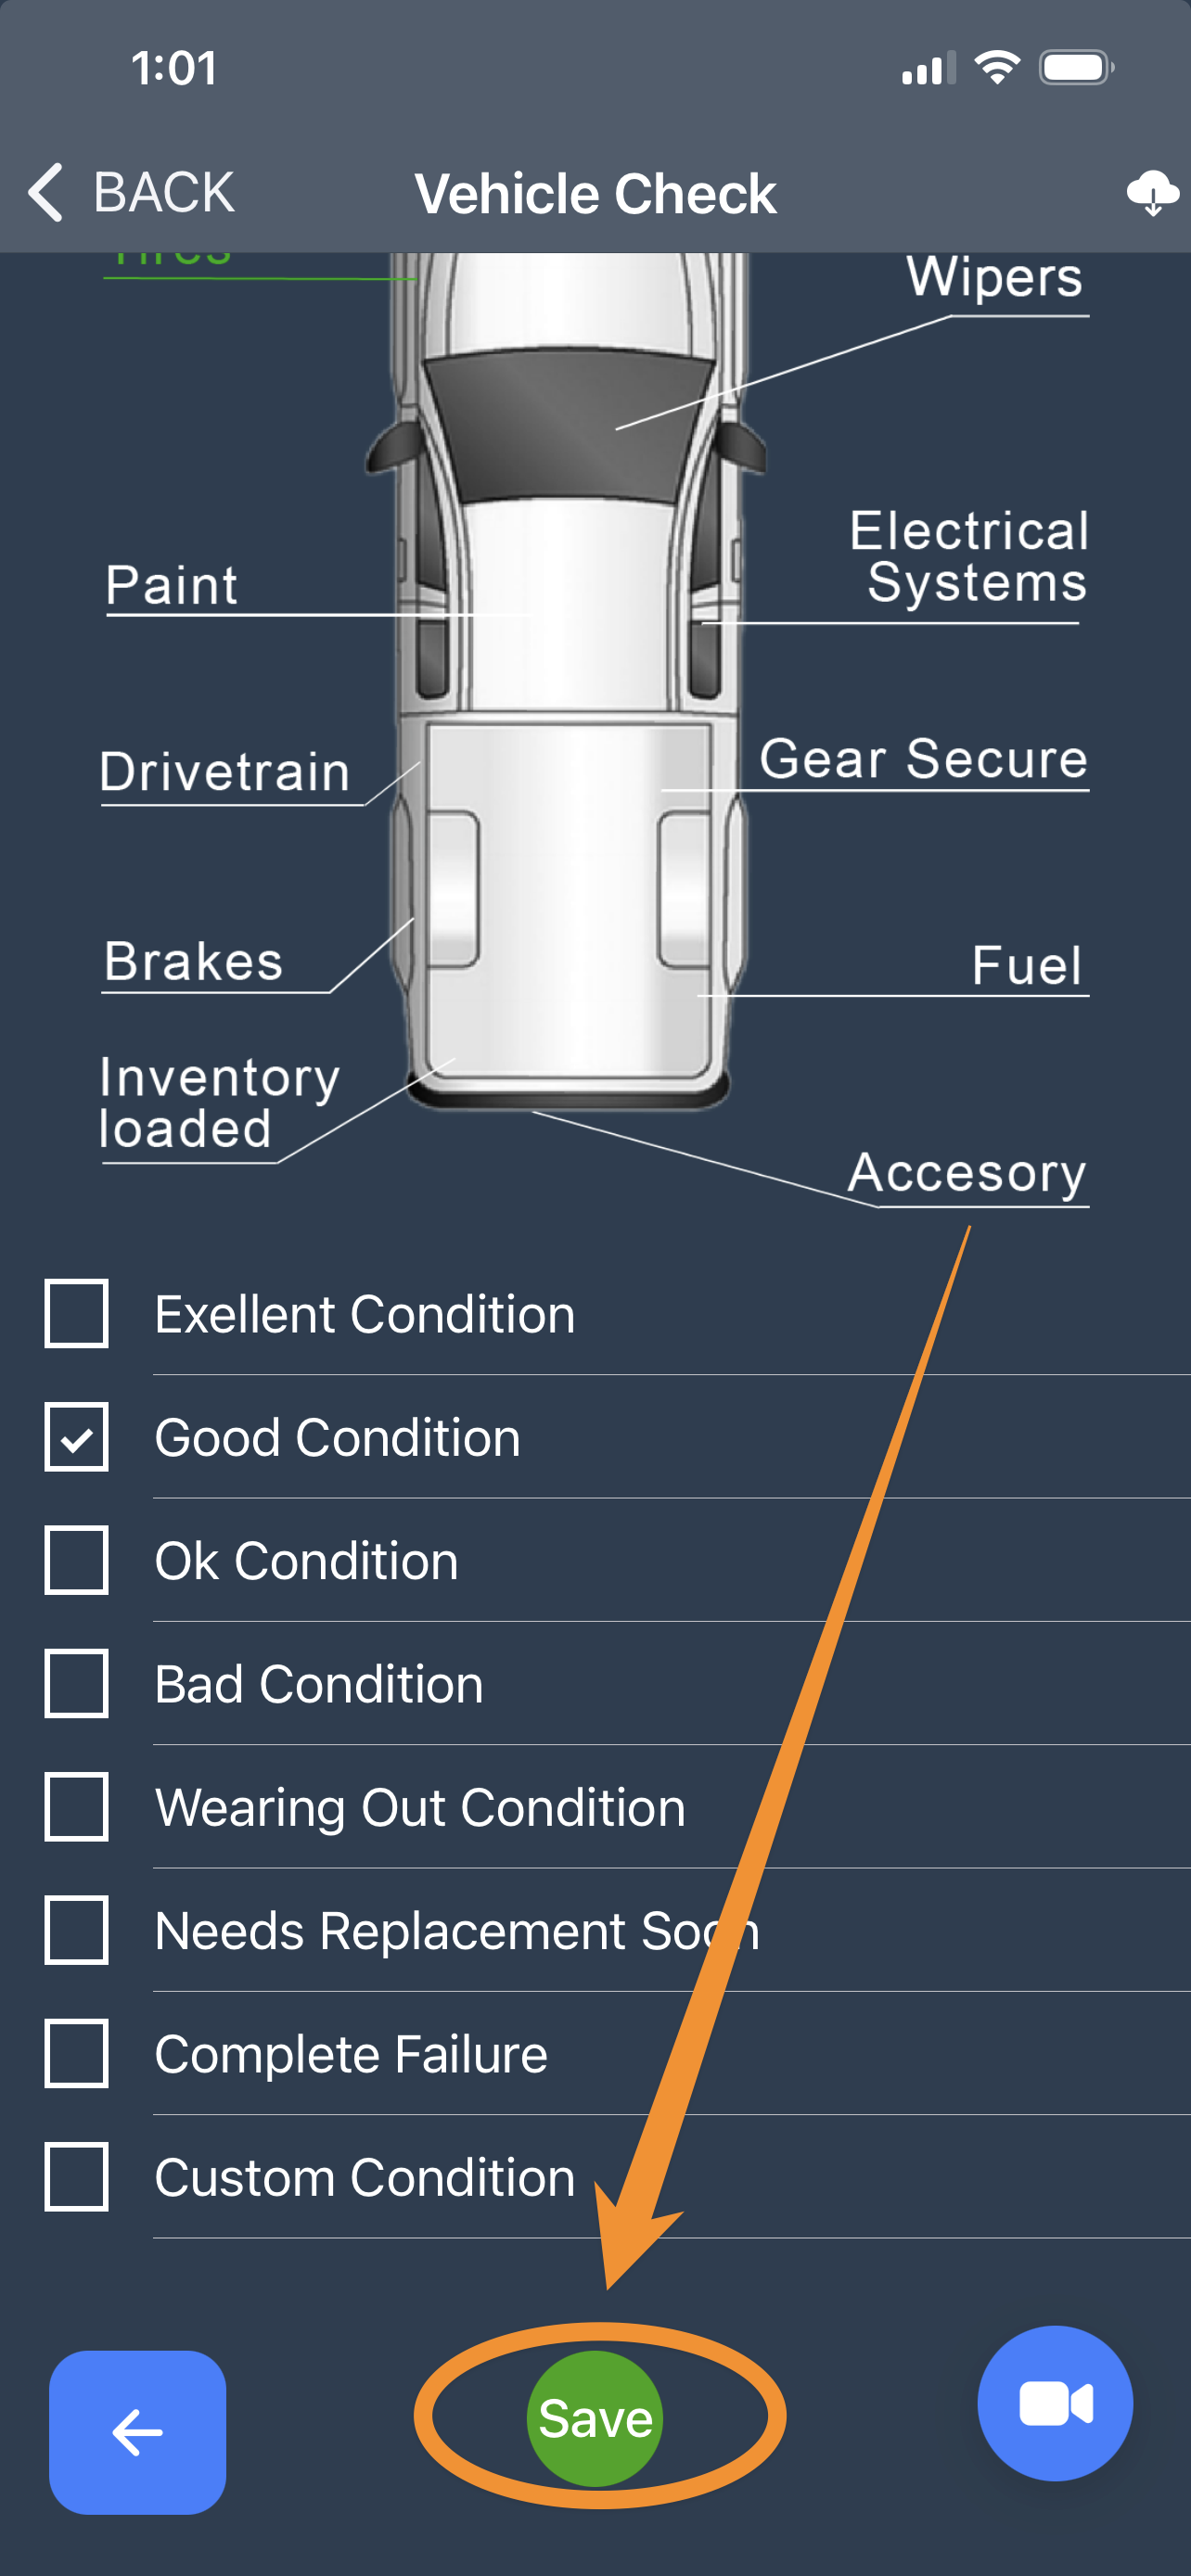
4. Starting with OIL FILTER, select the areas needing to be checked, then fill in the appropriate field below (i.e., Empty, 1/8 ... Full, etc). Then use the Left or Right BLUE ARROWS at the bottom to cycle through the next area.
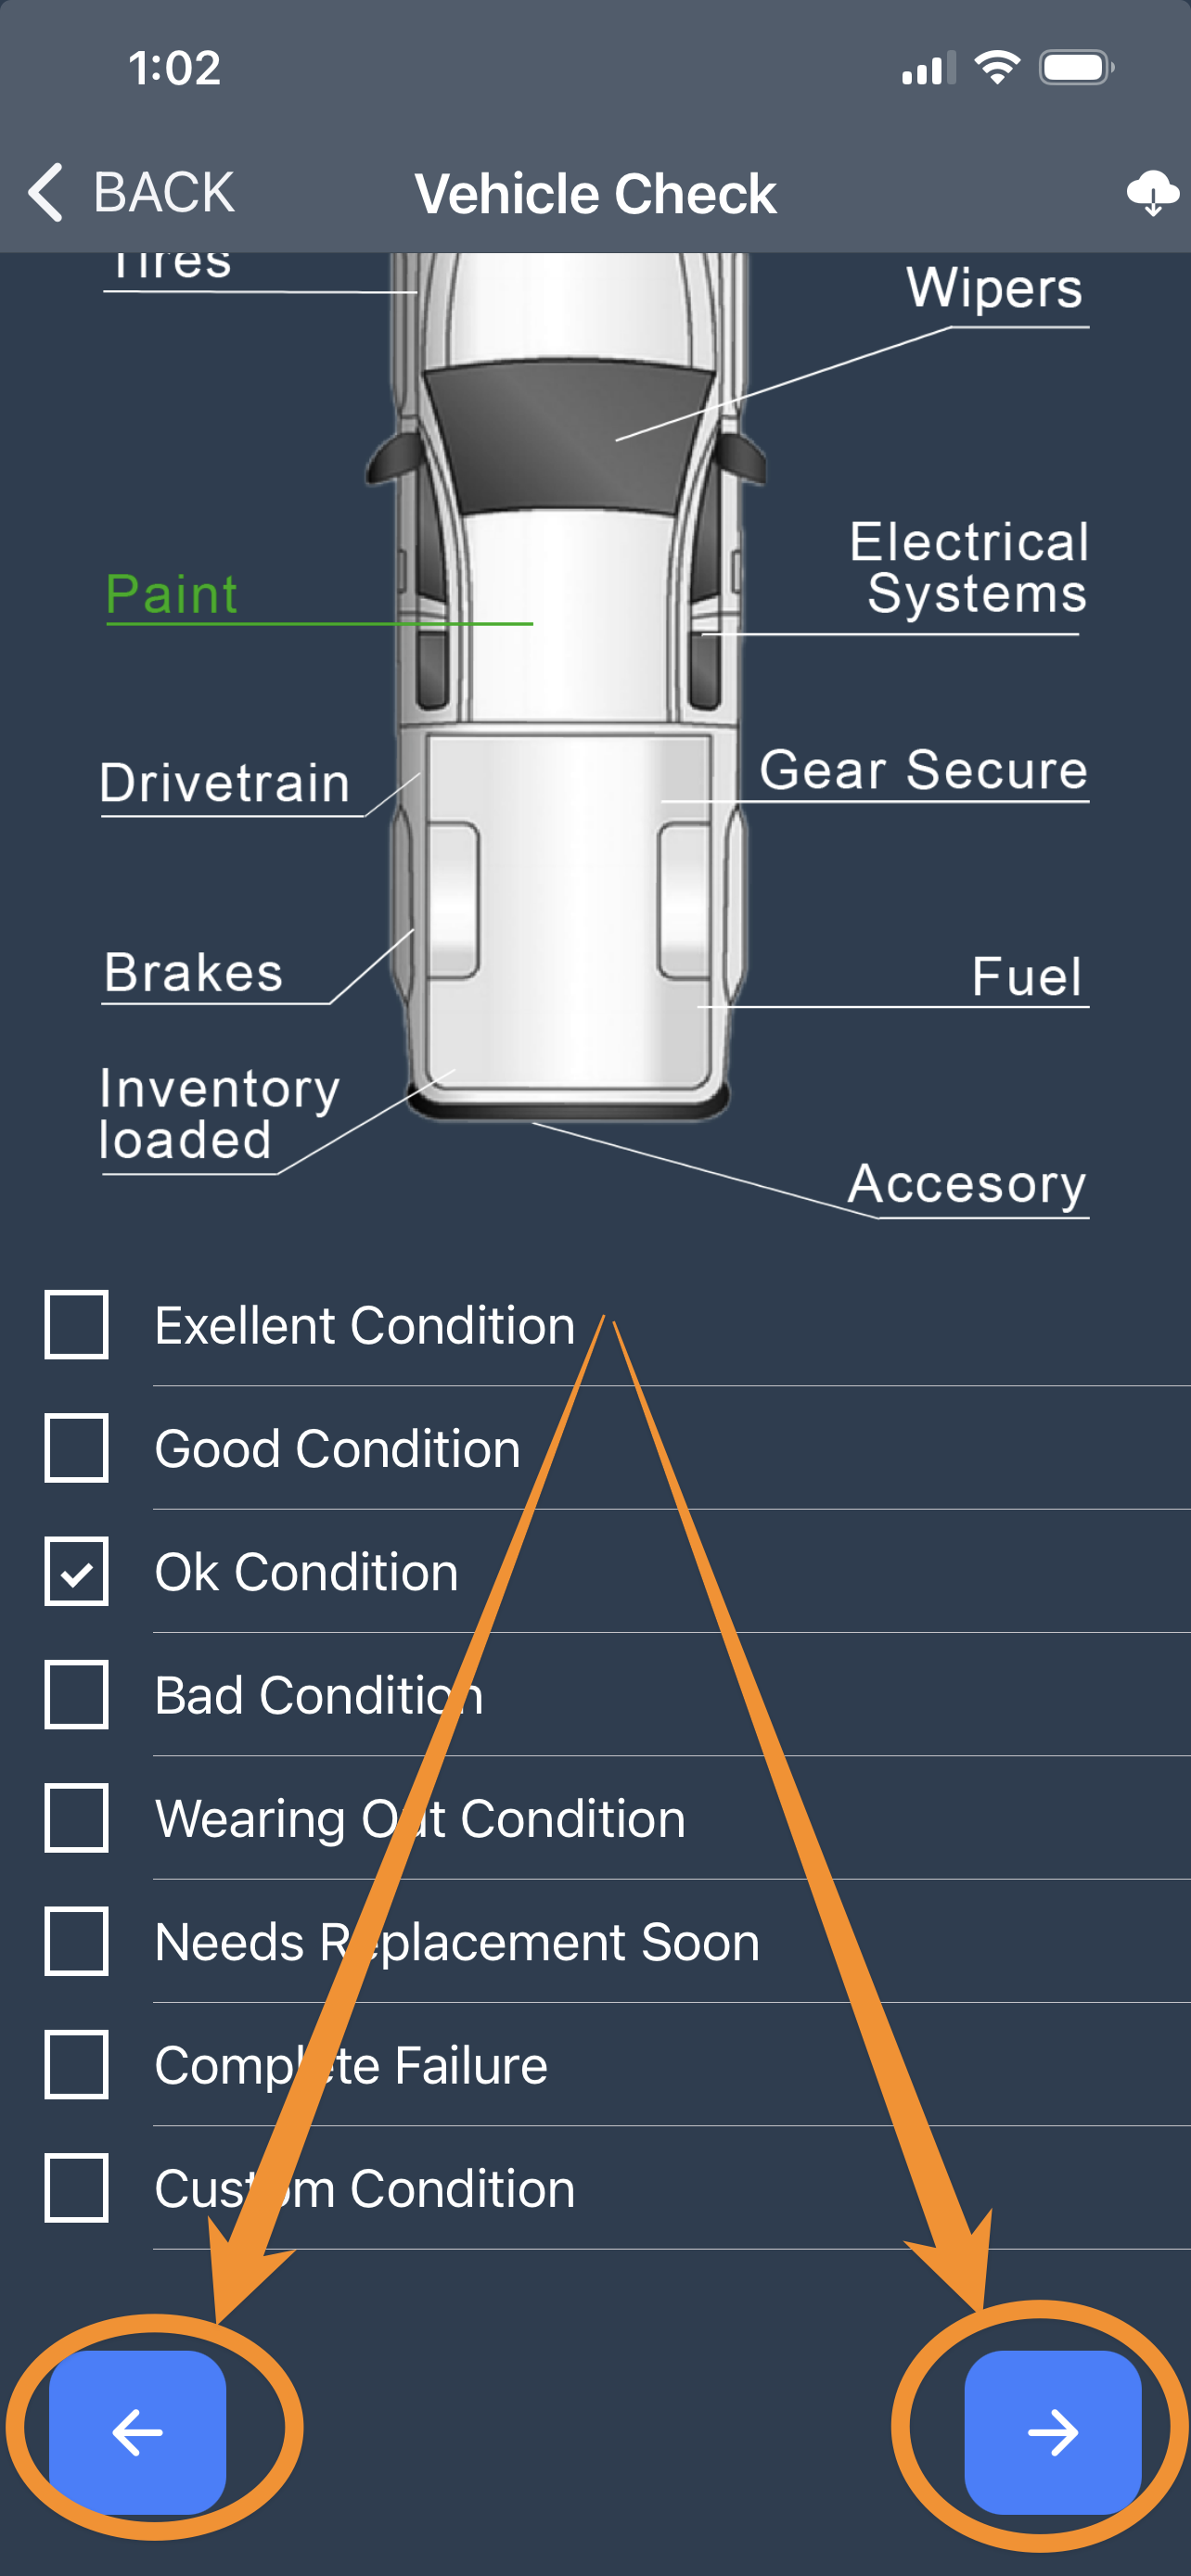
5. Once all areas have been filled in, hit SAVE.
______________________________________________________________________
From the Fleet Manager on a desktop or laptop computer, navigate to Plus from your Company Dashboard (see Step 1 at the top of this page).
Now that your technician has hit SAVE from the Fleet Manager tab in the Plus App, you can select the Checklist tab to see the completed Checklist. The RED CIRCLE on the right side of the Checklist can be used to remove a Checklist if it was entered incorrectly.
Be sure to check out our other Help Pages and our YouTube Channel with over 100 videos and tutorials!
Here's the link: https://www.youtube.com/@Paythepoolman
If you have any other questions or need further assistance, you can reach out to our Support Team at
support@paythepoolman.com or (951) 234 5166.
Office hours: Mon-Fri 8AM to 4PM EST| 5AM to 1PM PST
Have a nice day!